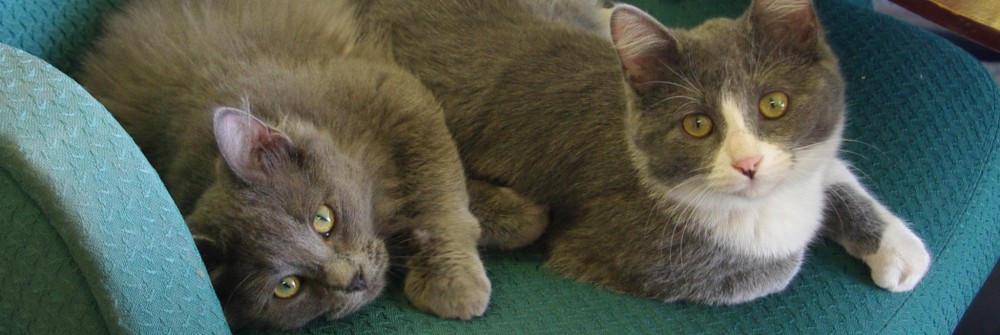
Cinnamon Whiskers

IMG_3700Our girl is on this new thing where she can’t eat wheat… something about her allergies… we don’t get it.  We think she is faking… we’ve never heard her sneeze at a cookie.

We want to be supportive, but she says we can’t have cookies or muffins or anything fun!  After about the third day of this nonsense, M & I headed to Pinterest and started searching for a wheat-free sweet treat….Crockpot Cinnamon Almonds…. yum!

BOUNS:  It makes the office smell totally pawesome… and we made it in the crockpot, so no open flame (office rule number 3#).

The girl was super pleased and we were happy to have treats in the office… M had to spend the rest of the afternoon cleaning the sugar out of her whiskers, but it was well worth it!

We have changed the recipe from what you will find on the blog… We thought it had too much extra sugar… it was just clumpy and got stuck in our whiskers.  We also used pecans instead of almonds and added more spices….

Crockpot Cinnamon Pecans

  • 1 c Sugar
  • 1 c Brown Sugar
  • 3 Tbsp. Cinnamon
  • 1/2 tsp Nutmeg
  • 1/4 tsp Cloves
  • 1/8 tsp Salt
  • 1 Egg White
  • 2 tsp Vanilla
  • 1lb Pecans
  • 1/4 c Water

In a medium sized bowl, mix together sugars, spices, and salt. Set aside. In another medium sized bowl, whisk the egg white and vanilla until it’s a little frothy. Add pecans. Make sure the pecans are thoroughly coated in the egg white mixture. Add cinnamon mixture to the pecans and toss until coated.

Thoroughly coat your crock pot with cooking spray. Add the pecans and sugars to the crock pot and cook on low heat.

Cook (with the lid on) 3-4 hours stirring every 20 minutes. In the last hour, add the water and stir well. This creates the crunchy coating. Continue cooking for another 45 minutes to 1 hour… keep stirring

Line a baking sheet with aluminum foil* and spread the pecans flat to cool. They will be sticky at this point, so make sure you separate them a little and have no large mounds.

*The lady on the other blog said she spread her almonds out on parchment paper, but when we did that they totally stuck to it!  We’re thinking aluminum foil instead…

— M&M

Down Around the Ears

The girl was looking a bit down around the ears today…. you know what I mean?  Just not her perky-self…. kind of dragging….

We tried everything to lift her spirits… M did a bit of a dance on the table.. weaving in and around the vase of paper flowers… M is an excellent dancer.  Nothing.  Not even a giggle!

We tried to get her to play with Mouse or our new feather that we got for Christmas…. M hid Mouse in the girl’s desk (the girl loves surprises!) while I demonstrated how much fun feathers can be when combined with a freshly polished desk.  Still nothing.

M suggested putting a bit of catnip in her tea….  but then I remembered this great drink the  girl had been talking about a few weeks ago!  She’d had lunch at the Blue Owl in Kimmswick….. we’re not allowed to leave the office, so going to Kimmswick is out of the question, but the Blue Owl has a little shop here in town called the Blue Owl Sweet Shoppe…. and they deliver!.. so sometimes we get samples…. love the Chicken Salad Croissant!  Anyway… apparently the girl had ordered this pawesome drink with her pie and she just kept raving about it…. she said it made her sleepy and happy…. Well!  That is exactly what she needed now!

We surfed around on Pinterest for a while…. then googled… and we just couldn’t quite find a recipe that sounded like what the girl had been talking about.  Finally we took three recipes that sounded kinda close and we tinkered around with them until we came up with something that seemed right.  We might have done a bit to much sampling, because we needed a nap in the worst way… but we had the girl to think of so we pushed on…..  We slid the cup across her desk and pulled the mouse (not a real mouse… a computer mouse….. don’t feel bad, it confused us too at first) away from the girl….. then we sat and stared at her until she drank it.  The girl sighed….. and then she smiled.

M and I got some really pawesome ear scratches and the girl was really happy then.  We danced around the desk until she polished off the rest of her drink (we might have sampled a bit more of the whipped cream…. it is really pawesome!).  Then we suggested a short nap…. The girl said she didn’t need a nap, but we sat on her lap and held her down until she dozed off for a bit.

We’re a team here…. gotta look after our co-workers!

Here is what we finally came up with… mega yum!

Pumpkin Pie Apple Cider Toddy 

Pumpkin Pie Apple Cider Toddy

Ingredients

  • 3 c Apple Cider
  • ½ c Butter, softened
  • ¼ c Light Brown Sugar, packed
  • 1 tsp Nutmeg
  • 1 tsp Cinnamon
  • 1 tsp Ground Cloves
  • 2 tsp Rum
  • 2 c Heavy Whipping Cream
  • 3 Tbs Powdered Sugar
  • ¼ c Honey Whiskey

 Directions

Heat the apple cider and whiskey in a small saucepan until warm.

Combine softened butter, brown sugar, nutmeg, cinnamon, and cloves. Whip until butter becomes creamy and the ingredients are fully incorporated.  Chill.

In a separate bowl combine rum and whipping cream, whisk until fluffy; add powdered sugar.

In a pretty footed coffee glass, place a spoonful of spiced butter.  Ladle the hot cider to fill the glass. Garnish with a dollop of rum-whipped topping. Serve warm.

Drink responsibly!

– M&M

Teddy Bear Tea

Our girl is sooo good to us!  She got us a Teddy Bear!  Not the stuffed kind…. the slurp-able kind…YUM.

The girl knows how much M & I like our coffee… helps us get going in the morning.  While the girl is just stumbling around the office, we get a couple slurps of her coffee and then we run up the stairs and check out the other offices… then we run down the stairs and get a couple more slurps of coffee.  And then we run into the back office and make sure she is cleaning our litter box and changing our water…. then we run up the stairs to make sure we didn’t forget anything…. then we run down the stairs…. then we run up the Christmas Tree to check that all the lights are working… then while she goes out to check the gas machine we jump up in the window and wave at her and check the glass for smudges… we leave paw prints on the glass so she knows where the smudges were….. When she comes back in we drink more coffee together and M & I help her check our emails…. Our typing is getting much better!  The girl should drink more coffee… then she could be as productive as M & me!

Well… this morning we took a slurp of her coffee…. OMP!  It wasn’t coffee!!!

While the girl wiped up the ‘tea’ that M had spit everywhere the girl explained that she had visited a new coffee shop over the weekend and discovered Teddy Bear Chai.  Well, M & I were reeling from this new information…. Who knew there were whole SHOPS of coffee?!  OMP!  Whole shops!!  We thought all coffee came from K-Cups!

After sampling the Teddy Bear Tea again, M & I decided it was pretty pawesome… and we didn’t need to worry about a drop in our caffeine since it was made with black tea… whew!

The girl said she is still experimenting with the exact amounts, but this is pretty close to what she’d had at the coffee shop.  The coffee shop used concentrated Oregon Chai, but the girl already had regular Chai tea bags at home, so she just made her own.

Now that we know they exist we are encouraging the girl to visit more coffee shops!  We wish Starbucks would deliver.  * sigh *

Teddy Bear Chai

Teddy Bear Chai Tea

  • 8oz Chai Tea, brewed STRONG
  • 1 tsp Vanilla (the good Mexican stuff… no imitation, yuck)
  • 1 Tbs Honey
  • 1/4 c Vanilla Cream (You could just use milk, or cream, but the Coffee Mate – Natural Bliss already has some sugar in it too…)

Warm the Vanilla Cream before adding it to the tea to take the chill off…. add the other ingredients to your own personal taste.  As it cools the honey flavor comes out more, so don’t go wild with the honey at first.  Mix and serve!

– M&M

A Kitten at Heart

Happy Birthday to the man!!

The girl told us that the man’s birthday was coming up and we wanted her to make him something really yummy for his party.  M said that she’d heard him say that red velvet was his favorite cake, so we started searching Pinterest for a good recipe.  We finally found THIS recipe and asked the girl to make it.  We also asked that she bring us a piece (since we wern’t invited back to her house for the man’s party!  So rude!)

Megga-Yum!  One warning…. don’t eat red velvet cake and then try to clean your paws…. red paws!

– M&M

Red Velvet Cheesecake

INGREDIENTS:

CHEESECAKE:
Two (8-ounce) packages cream cheese, at room temperature
2/3 cup granulated white sugar
pinch of salt
2 large eggs
1/3 c sour cream
1/3 c heavy whipping cream
1 tsp vanilla extract

RED VELVET CAKE:
2 1/2 c all purpose flour
1 1/2 c granulated white sugar
3 TBS unsweetened cocoa powder
1 1/2 tsp baking soda
1 tsp salt
2 large eggs, at room temperature
1 1/2 c vegetable or canola oil
1 c buttermilk
1/4 c (two 1-ounce bottles) red food coloring
2 tsp vanilla
2 tsp white vinegar

CREAM CHEESE FROSTING:
2 1/2 c powdered sugar, sifted
Two (8-ounce) packages cream cheese, at room temperature
1/2 c unsalted butter, at room temperature
1 tsp vanilla

DIRECTIONS:

Cheesecake layer:

Preheat oven to 325 degrees F.

Place a large roasting pan on the lower rack of the oven.  Spray a 9-inch springform pan with nonstick spray and line the bottom with a round of parchment paper. Wrap a double layer of foil around the bottom and up the sides of the pan (you want to seal it so the water from the water bath doesn’t seep into the pan).

In a large bowl, use an electric mixer to mix the cream cheese until it is and smooth and creamy. Mix sugar and salt and blend for 2 minutes, scraping down sides of the bowl as needed. Add eggs, one at a time, blending well after each addition. Finally, mix in sour cream, whipping cream and vanilla. Blend until smooth.

Pour batter into the prepared pan. Set the pan into the roasting pan in the pre-heated oven. Carefully pour hot water into the roasting pan so that there is about an inch of water coming up the foil along the sides of the cheesecake pan.

Bake the cheesecake for 45 minutes. It should be set to the touch and not jiggly. Remove the cheesecake from the roasting pan and let it cool on a wire rack for at least an hour. When it has cooled, place the pan into the freezer and let the cheesecake freeze completely. (several hours or overnight)

Cake layers:


Preheat oven to 350 degrees F.

Grease and flour two 9-inch round metal baking pans.  Wrap Wilton – Bake Even Strips around pans.

In a large bowl, whisk together flour, sugar, cocoa powder, baking soda and salt.

Add eggs, oil, buttermilk, food coloring, vanilla and vinegar to the flour mixture. Using an electric mixer on medium-low speed, beat for 1 minute, until blended. Scrape sides and bottom of bowl with a rubber spatula. Beat on high speed for 2 minutes.

Spread the batter evenly into the prepared pans, dividing equally.

Bake 30 to 35 minutes or until a toothpick inserted in the center comes out with a few moist crumbs attached. Let cool in pans on a wire rack for 10 minutes then remove cakes from pans and allow to cool completely.

Frosting:

In a large bowl, using an electric mixer on medium-high speed, beat powdered sugar, cream cheese, butter and vanilla until it is smooth and creamy.

Assemble the cake:

Stack the cake layers: Red Velvet, Cheesecake, Red Velvet… no need to put icing in between the layers.

Frost:

Frost the cake with the icing and decorate, as desired.

Pawesome Pastabilities!

The other day the girl brought her lunch to work and she wanted M & I to sample it.  She didn’t out-and-out say she wanted us to try it, but we know that is what she wanted because when the phone rang she just left her lunch sitting on the table….. she is very shy… she doesn’t like to ask for things…. we’re working with her on this.  Anyway, she’d brought some leftover spaghetti and meatballs that she’d made for dinner the night before…. It smelled pretty good, so M & I didn’t mind giving it a try.  OMP!  It was totally pawesome!  There were three meatballs, so we figured that she wanted us each to have one….  We could tell that she was really excited that we’d tried them… she was jumping up and down and waving her arms while she was still on the phone.  As soon as she hung up she came running over to see what we’d thought.

Oh, my paws!  It was totally Pawesome!

Later she told us that the meatballs came from an idea she had after making a Parmesan Meatloaf that she’d found on Pinterest.  With the Balloon Festival fast approaching the girl has been all in a tizzy.  We don’t know what she is complaining about!  We’re the ones who have to greet all the people popping in the office!  Geeze, she just plays on the computer and talks on the phone all day….. like that’s work?!  But, she says that she is very busy and is so tired when she gets home that she doesn’t feel like cooking.  She told us that she took the meatloaf recipe and made THREE different meals with it!  We were totally impressed ’cause usually we just eat kibbles for every meal…. Three DIFFERENT meal!  Wow!

The girl just has one pet human, B, and herself to cook for, and she says that the Parmesan Meatloaf recipe made too much for the two of them.  So she made the full recipe but only made a third the mix into a meatloaf.  The remainder she made into meatballs.  And then she used the meatballs to make Spaghetti & Meatballs AND Shepherd’s Pie!  Wow!  We were worn out just thinking about all that, but the girl insisted that it was pretty easy.

Day one: Make the meatloaf mix.  One third of the mix gets shaped into a loaf and stuck in the fridge for tomorrow (or frozen).  The other half gets made into meatballs.  Spaghetti & Meatballs for dinner!  Pour some of the extra spaghetti sauce over the meatloaf.

Day two (or whenever, if you froze your meatloaf): Meatloaf and mashed potatoes for dinner!

Day three (or the day after you ate the meatloaf & mashed potatoes…): Shepherd’s Pie for dinner!

You see how there’s an order here?  We didn’t get it at first, but the girl had taken photos…. (we don’t know why she does that, but it did come in handy)…

This slideshow requires JavaScript.

Parmesan Meatloaf 
slightly adapted from Mommy I’m Hungry

1 lb ground turkey
1 lb ground beef
2 eggs
1/4 cup breadcrumbs
1/2 teaspoon dried basil
1/2 teaspoon dried thyme
1/2 teaspoon dried oregano
1-2 cloves garlic, finely minced
1 small onion, grated
1/2 teaspoon salt
1/4 teaspoon ground black pepper
1/2 cup grated Parmesan cheese
1/2 cup mariana pasta sauce
1/2 cup shredded cheese

Pre heat the oven to 350 degrees.

Mix:
In a large bowl, combine the ground turkey and beef, eggs, breadcrumbs, thyme, oregano, basil, garlic, onion, salt, pepper and Parmesan cheese.

Meatballs:                                                                                                                        Shape mix into 1-2″ balls and cook in a skillet until lightly browned.  Finish cooking the meatballs in an oven heated to 350 degrees. (25-30 minutes)

Meatloaf:                                                                                                                          Place 1/3 of the mixture in the loaf pan and form into a loaf. Top the meatloaf with pasta sauce.  Place filled loaf pan on a baking sheet and bake in the preheated oven for 45 minutes – 1 hour. Remove the meatloaf from the oven and sprinkle the top with shredded cheese. Place the meatloaf back in the oven and bake until the cheese is melted.

Make mashed potatoes to serve with the meatloaf.  You will need about four cups of leftover potatoes for the Shepherd’s Pie…. so make about 2-2.5lbs total (if you are making REAL mashed potatoes)

Shepherd’s Pie: Most Shepherd’s Pie recipes call for “ground” meat… so you could make 1/3 of your mix “smashed”, but meatballs are fun and easier to have cooked and frozen earlier…

Place two cups of mashed potatoes in a pie pan.  Sqhoosh it around to make a “crust”.  Fill the crust with the meatballs, and whatever veggies you like: corn, carrots, peas…. then top the whole thing with two more cups of mashed potatoes.  Bake at 375 degrees for 45-55 minutes…. crust will start to brown.  Top with a handful (or two) of shredded cheese and bake until the cheese starts to bubble.

Enjoy!

Meow-Out to the girl’s pet human, B!  Thanks for saving some for us, pal!

-M&M

S’more Adventures

So M & I have been doing a lot of reading lately.  See, our humans have this big festival that they host in the fall and this year M & I are lending a paw.  We’re really excited, we’ve invited all our friends…. But we’ve never hosted a big event like this and we want to make our humans proud… so we turned to the Source of All Knowledge, Google, for advice.  A quick internet search for: “cats + hot air balloons” returned the book ‘Hot Air Henry’ by Mary Calhoun.  Totally pawsome book!  You should read it if you haven’t already.

‘Hot Air Henry’ didn’t offer a lot of help on planning our Balloon Festival, but we now know what to do if one of the balloons should escape.

When we ordered Hot Air Henry from Amazon.com we went ahead and took advantage of the Super Shipper Savings and ordered the second book.  Cross Country Cat, the sequel to Hot Air Henry, didn’t offer us much insight into planning a Balloon Festival.   Oh well, it was a great book anyway and it got me and M hooked on the idea of cross country travel and camping out.

Since we are not allowed outside we’ve been forced to practice our camping skills in the office.  M & I have been turning our kitty tower on its side and using it as a tent.  The Man has been a real pain in the tail about this… he keeps turning it back upright and returning it to the corner.  M suggested that we pretend he is a bear and see how well the bear spray we ordered works.

During our research we discovered that s’mores are a staple of the campers diet.  Other than buying us the marshmallows, chocolate bars and graham crackers, the girl has not been very supportive of our camping efforts.  She totally flew off the handle when she found us using one of her candles and her scissors to roast the marshmallows.  Perhaps it was the defective marshmallows that we left of her desk that was the issue?  I’m not eating them if they’re burnt… I’m just not!

Of course, when she discovered that we’d tried to make s’mores in the toaster oven she wasn’t any happier.  Frankly, it’s not our fault that the toaster oven doesn’t come with a s’more setting.  M just cranked it up to ‘broil’ and we curled up for a nice nap expecting to wake to a batch of delicious s’mores.  An hour later the smoke alarm and the girl were both making a ton of racket and M & I had to abandon our nap and the hope of getting any s’mores.

M & I spent the next day pouting and sulking… we were grounded.  Totally not fair!  I mean, we did get one of the nice firemen to sign up for flying lessons, so it wasn’t a total disaster.

Finally the girl took pity on us (M kept giving her Sad Kitten Eyes) and she found us a kitten/office safe recipe for s’mores.

Crockpot S’mores

This slideshow requires JavaScript.

You will need:

  • 1 (18.25-oz.) package Devils Food cake mix
  • 1 (3.9-oz.) package vanilla instant pudding mix
  • 3 large eggs, lightly beaten
  • 1 cup sour cream
  • 1/3 cup butter, melted
  • 1 teaspoon vanilla extract
  • 3 1/4 cups milk, divided
  • 1 (3.4-oz.) package chocolate cook-and-serve pudding mix
  • 1/2 cup crushed graham crackers
  • 1 1/2 cups miniature marshmallows
  • 1 cup semisweet chocolate morsels

Directions:

Beat cake mix, instant pudding, eggs, sour cream, butter, vanilla and 1 1/4 cups milk at medium speed with an electric mixer for 2 minutes.

Pour batter into a lightly greased 4-qt. slow cooker.

Cook remaining 2 cups milk in a heavy saucepan over medium heat, stirring often, just until bubbles appear; remove from heat and add the chocolate cook-and-serve pudding mix.

Pour pudding over the cake batter.  Cover and cook on LOW 3 1/2 hours.

Turn off slow cooker. Sprinkle cake with marshmallows, and chocolate morsels. Let stand 15 minutes or until marshmallows are slightly melted.  Top with crushed graham crackers just before serving.

So, not exactly the same thing as roasting marshmallows over a campfire…. but we did appreciate the girl’s effort.   The office smelled pawsome all day and the scent lured a number of our pilot friends into the office. Hanging out with our friends in the nice air-conditioned office…. M & I realized we really are two very lucky kitties.

– M&M

Wasps Smell Ouchie

As you may already know, M & I have been taking the Ground School offered at our airport.  If we’re going to be the heads of Airport Security & Hospitality we figured it would be professionally beneficial to earn our Pilot’s License (never mind that we’d be able to chase birds better!).

Well…. I was reading out of the Pilot’s Handbook while M was practicing a particularly difficult set of ground traffic control paw signals with one of the wasps that had made its way into the office.  She was directing it to make another go around before landing…. well…. I’m not entirely sure what happened.  Maybe the wasp misunderstood?  Or perhaps M didn’t signal correctly?  At any rate…. the wasp landed on her nose and…. STUNG HER!  Right-on-the-nose!

Totally uncalled for!  I jumped down from my chair and ordered that wasp to land.  Then I ramp-checked him and terminated his authority to fly….. permanently! (91.123)

Obviously, that was the end of studying for the day.  M walked around rubbing her nose and complaining bitterly for quite some time.  I was worried that she might become so discouraged that she would want to quit studying for our Pilot’s Licenses.

To take her mind off the ouchieness of the whole situation I decided to have our human, the girl, whip her up a little treat.

Easy Peasy Peppermint Mocha Frappucinos

This slideshow requires JavaScript.

You will need:

  • 1 packet Starbucks Via Mocha Flavored Coffee
  • Nestle Coffeemate – Peppermint Mocha
  • Ice
  • Water

Here is where the directions get a bit vague…. Just throw the ingredients in to your personal preference….. more coffee flavored? Add less water…. More peppermint?  Add more Coffeemate… you get it?   Add enough ice (about 1-1.5 cups cubed) to make it nice and thick. Blend…. YUM!

The girl used her new Oster – My Blend blender, but you could use a regular blender.  We like the Oster – My Blend because we can add all the ingredients to the cup, screw on the blender lid and then it just locks into place in the blender….. once it’s blended you just unlock the cup, flip it over, remove the blender lid and screw on the travel lid!  Much easier and more convent for little paws… and clean up is a snap!  We just give the girl the blender lid and she washes it in the sink!  Easy peasy!  It comes with a nice travel lid so we can drag it around with us and slurp right out of the cup (we are still working on using a straw)!

M alternated slurping and resting her nose against the cup for the rest of the afternoon.  I am happy to report that she has fully recovered and is back to studying for her Pilot’s License!  We are on schedule to graduate with the rest of our class in August.  Next step… FLIGHT LESSONS!

If you’re interested in learning to fly too, join us for class!  Festus Airport Ground School Classes – We’d be happy to lend you a paw!

– M&M

Diabetics are not Bugs

Recently we learned that a some of our humans were diabetics.  At first we were terrified!  Mayhem ran straight for our office to grab the flea & tick medicine.  I remained calm though… While M rifled through our supply drawer, flinging toy mice and treats everywhere, I calmly climbed up on the desk and began to Google.  A few moments on the  net and I discovered our error.   I called to M who was balanced on the back of one of our human’s chairs, trying to apply flea & tick medicine to the back of his neck.  Thanks to my quick Googleing, we learned that diabetics are NOT giant ticks.  Whew!  ‘Cause if they were, M and I were doomed!

According to Google (who is all knowing) diabetics have trouble balancing their blood sugar.  If left unchecked it can cause all sorts of health problems (it can even effect cats!).  We contacted our Veterinarian (hug a vet!) right away who suggested that we change our humans kibble and cut out the extra treats.  Blood tests would help us see if our humans would need insulin shots as well.  Unfortunatly, we are not allowed out of the office and we doubted we could get our humans to go to the vet on their own!   So we decided that we would have to start offering our humans healthier food choices.

So we clicked away from Google and went to our second favorite source of all knowledge….. Pinterest!

On Pinterest we saw a number of other humans making salads in jars…. rabbit food is totally healthy!

You will need:

  • a mason jar
  • lettuce (go for organic and get the fancy multi colored kind!)
  • dressing of your choice (watch the sugars!) the girl used raspberry poppyseed
  • blueberries (which fruits are safe for diabetics?  American Diabetes Association)
  • carrots, shredded
  • fetta cheese (blue would be yummie too!)
  • dried cranberries
  • pecans, chopped

Directions:

Dressing first, then the shredded carrots.  The carrots kind of marinate in the dressing and really soak up the flavor.  Next go the berries, then the cheese… you want to keep the lettuce from touching the dressing or it will get slimy (ick), smash in the lettuce and top with a sprinkle of chopped pecan for crunch.

One huge con: we can’t get the jars open by ourselves…. when the girl brings things in plastic we can usually throw them off the desk and the lids pop right off!  The jars are not paw-friendly… but the girl said that the jar did seem keep her salad extra cold.

One human on Pinterest said that these salads would survive six days in the jars.  We can’t vouch for that yet, the girl ate all hers before the six days were up…. We’ll let you know if we can keep her out of them long enough.

We also found this awesome recipe from the Sugar-Free Mom for Personal Sized Baked Oatmeal.  Muffins!  Our humans love muffins!  Check out Sugar-Free Mom’s blog for this and other great sugar-free / human-friendly recipes!

Remember, if you don’t take care of your humans they certainly won’t take care of themselves!  Learn more about how to care for your diabetic human at the American Diabetes Association.

We’d love to hear from you!  Lend us a paw and send us your human / diabetic friendly recipes!

M&M

Birthday Food!

Mischief and I are in charge of Airport Security and Hospitality…. so that means we get to throw people out AND throw parties!  Parties are my favorite!

Yesterday was one of our favorite human’s birthday, so M & I decided to throw him a surprise birthday party.  We had the girl send out an email to invite all of our friends and then we sent her home with a long grocery list and a directions to make chili and cookies (because that is what humans like to eat….. M & I prefer ice cream).

All of our friends came and our pal was super surprised by the party.  M & I tried to help set everything up, but the girl didn’t like how we wanted to arrange everything.  She suggested we go take a nap in our office… we were pretty worn out from all the setting up we had to do….

Apparently the girl made some pretty good cookies, because when we woke up from our nap they were all gone…. so here is her recipe.  If you make them, maybe you could save one or two for us?

We want to send a Meow-Out to our pal, Jeff… Happy Birthday, buddy!

– M&M

Lemon Gooey Butter Cookies

Ingredients

  • 1 (8 ounce) package cream cheese
  • 1/2 cup butter, softened
  • 1 egg
  • 1/4 teaspoon vanilla extract
  • 1 (18.25 ounce) package lemon cake mix – Strawberry works really well too!
  • 1/4 cup confectioners’ sugar

Directions

  1. Preheat oven to 350 degrees F.
  2. In a medium bowl, cream together the cream cheese and butter. Stir in the egg and vanilla. Add cake mix, and stir until well blended. Roll into 1inch balls and roll the balls in the confectioners’ sugar. Place 1 inch apart onto an ungreased cookie sheet.
  3. Bake for 10 to 13 minutes in the preheated oven. Remove from baking sheets to cool on wire racks.

http://allrecipes.com/recipe/gooey-butter-cookies/